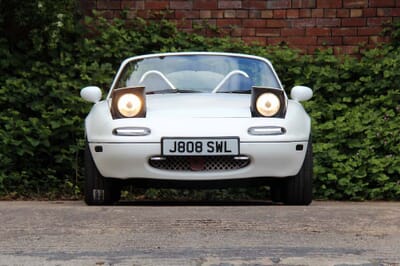
In our 3rd modification to our 'Great Mk1 Giveaway' project car, you choose to add the option of Smoked Lights Front & Rear, plus Sequential Front Indicators and Side Repeaters - here's how they look and some top tips on how to fit them.
Using a selection of goodies chosen by you from MX5 Parts we’ve been upgrading a Mk1 MX5 ahead of giving it away in a free prize draw, the latest bits we’ve fitted being a full nose to tail lighting upgrade with a nifty smoked look and fancy ‘directional’ indicator units that go very nicely with the white paint of our car.
This is a great way of modernising your MX5 and giving it a more contemporary look, the package you voted on including those front indicator/sidelight units, illuminated and smoked bumper reflectors also by IL Motorsport, smoked indicator repeaters for the wings and, last but not least, Mk3-style clear LED rear lights. Here’s how we went about fitting them.
Thankfully for most lighting upgrades it’s a pretty simple job, requiring only basic tools and not too much of your time. We started at the front with the sidelight/indicator units, popping the bonnet and raising the lights for access to the back of them and to disconnect the wiring via the clip-in plastic plugs. These should be located into holes in the bodywork via clips, so can be a little bit of a wriggle to free but, once you’ve done that, you simply press the locking tab and pull them apart. That done you can now remove the old lighting units, which requires nothing more than undoing the screws on either side and gently coercing them out of the bumper.
Depending how long they’ve been in there you may find a bit of road muck and gunk in the housings, so have a bucket and sponge to hand to clean them out.
Fitting is just a reverse of the process, the new light units screwing in place. Note that the ‘outside’ screw is shorter than the inside one due to the shape of the bumper, so you’ll need to put the right one in the correct hole. Plug the electrical connector together, secure it back into the bodywork and you’re done – just repeat on the other side.
Next we turned to the reflectors on the sides of the front and rear bumpers, which again are secured by two screws each. On US market cars these are already wired for illumination but, as standard, UK ones don’t come with this so will require some additional cables spliced in. Thankfully ‘our’ car already had this done, the IL Motorsport reflectors using a simple adaptor to connect the standard bulb holder to the LED circuits within them. Which is a neat touch!
If your car isn’t already connected up for this it’s a relatively simple wiring job, though if you’re in any way uncertain about this best to consult an expert or professional before you start messing about.
On the plus side a European or JDM-spec Mk1 will at least have the wings drilled and wired for the side repeaters, which are a very simple swap. Just grip the old repeater, slide towards the back of the car and it should pull out. Disconnect the bulb, install into the new smoked unit and press back into the wing. Word to the wise – try not to lose the cable inside the wing while you’re doing this as it can be a fiddle to retrieve from the depths within. As we discovered…
Finally, the rear lights. You’ll need to disconnect the indicator bulbs on the outside of the units, which are a simple twist and pull out bayonet style fitting. You’ll then need to unclip the grey plastic housing for the rear and brakelights, which is easy enough and just pulls off having squeezed the obvious tabs. You can now unscrew the light unit via the obvious nuts securing it to the bodywork, pull it out and fit the new one in its place. As with the sidelights there was a bit of gunk in the recess when we did this so it’s worth cleaning this out while you have the opportunity.
With the light units screwed in place you can now connect up the wiring. This adapts the existing bulb fittings to plug into the LED lights, which is easy enough to do, after which you simply replace the grey plastic housings on the mounting tabs. For the indicators you may need to replace the standard bulbs with orange tinted ones given the clear lens on the light unit, but these are an easy swap and widely available. Just make sure you get some in before you start the job to make sure your lights are legal.
And with that you’re done!
A recap what the three modification options were
- Smoked Lights Front & Rear Plus Sequential Front Indicators, Side Reflectors and Side Repeaters
- Crystal Clear Front & Rear Lights
- Twin Low Profile Headlamp Conversion


Leave your comment