
While fabric hoods on MX5s are generally pretty sturdy and long-lasting there comes a point where you'll likely need to change it or perhaps consider replacement as part of a restoration or upgrade programme.
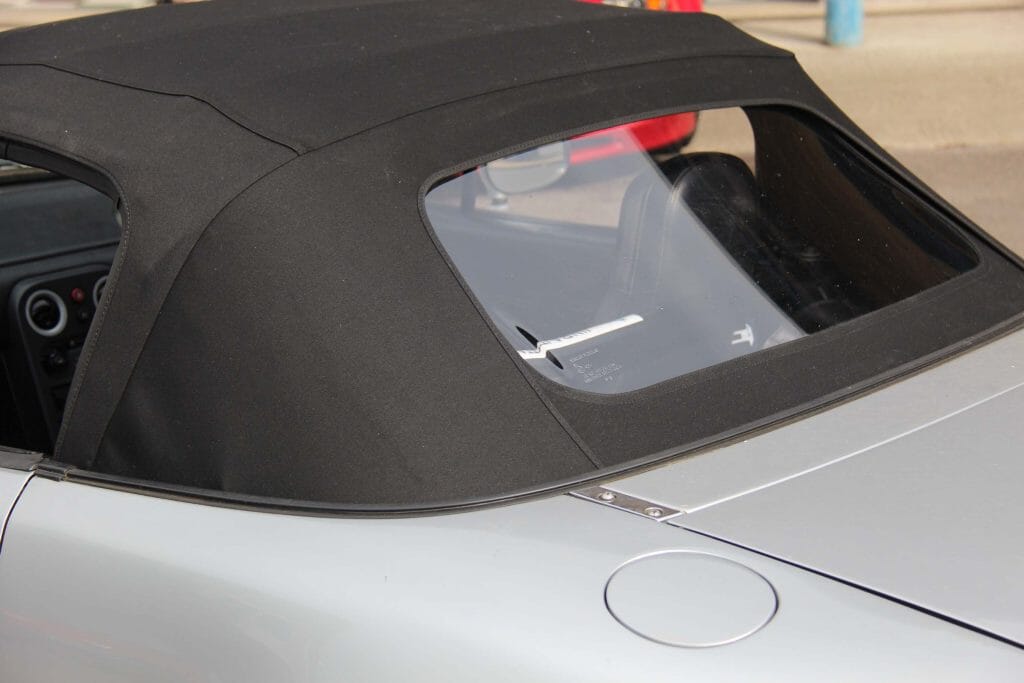
This presents opportunities, not least for Mk1 owners taking the opportunity to fit a hood with a glass rear screen from a Mk2. it's also a chance to consider a different coloured hood, go from standard vinyl to more premium looking mohair or any number of other options available to you.
Where our previous how-to guides offer a walk-through guide for the DIY mechanic in this instance We'll be demonstrating the MX5 Parts free fitting service, offered free with any hood purchased by calling us in advance to book a fitting appointment and then paying for your hood on the day. (Unfortunately we do not offer a free hood fitting service for orders placed via the website) This does mean of course a day trip to our Portsmouth HQ and we'd be delighted to see you at our showroom if you can make the trip. If that's a bit of a trek you can of course order the bits in the usual way and have a crack at fitting it yourself or getting a local specialist to do the job. But, either way, we thought it would be good to show you how the process works and share a few tips and techniques We've honed over the countless times We've done the job for our customers.
The walk-through you see here applies to Mk1s and Mk2s but we can fit new hoods to Mk3s and Mk4s too if required. Just check out the hood page for your mark of MX5 and browse the options at your leisure.
Want to dive straight in and see for yourself...
What you need
- Time and patience - expect it to take the best part of a day!
- Usual tools, including spanners, screwdrivers, socket set, etc...
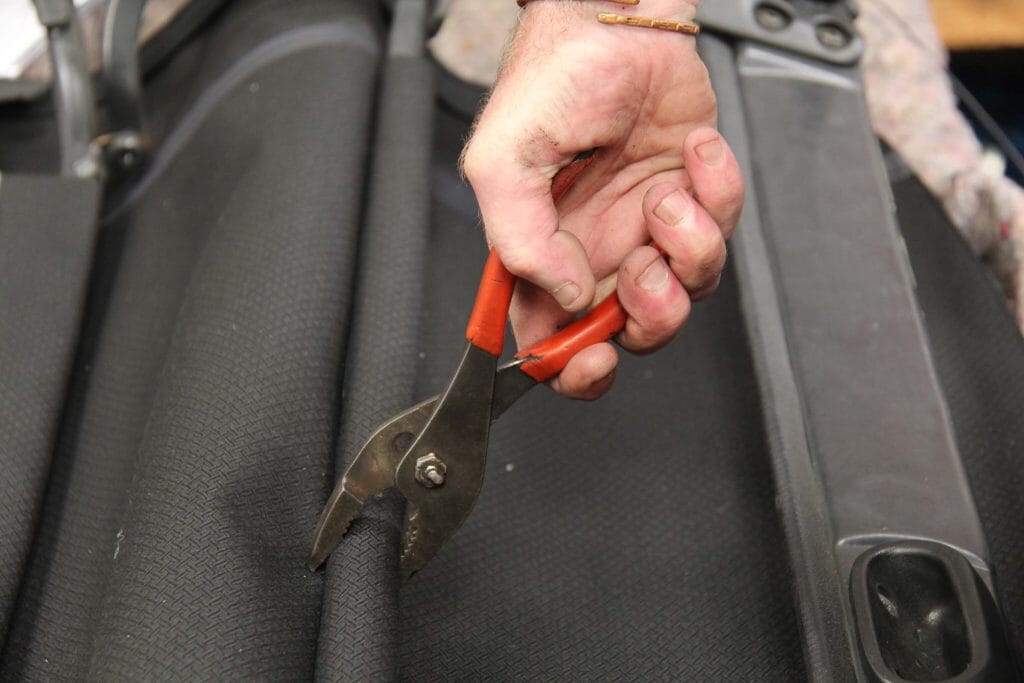
- Rivet gun or pliers
- Hood drain cleaning brush - available to buy here
- Acceptance you may discover a need for extra parts like rain rails, tensioner cables or suchlike and pause the job while you wait for the parts - we can deliver next day but be prepared for the fact you may have to down tools and finish the job later
How to do it
- Choose your hood and any other parts you might need - you won't know until you're committed to the job but it's quite common to require a new rain rail. We stock Mazda original and pattern ones from IL Motorsport, as well as tensioner cables and other common extra bits you may need along the way. We've even got full replacement frames if you're unfortunate enough to discover yours is rusted beyond recovery.
- Call us on 02392 644588 to book a convenient day to pop by for your free fitting.
- Doing it yourself? OK, good luck, Let's continue...
- If possible choose a warm, sunny day or do the job inside.
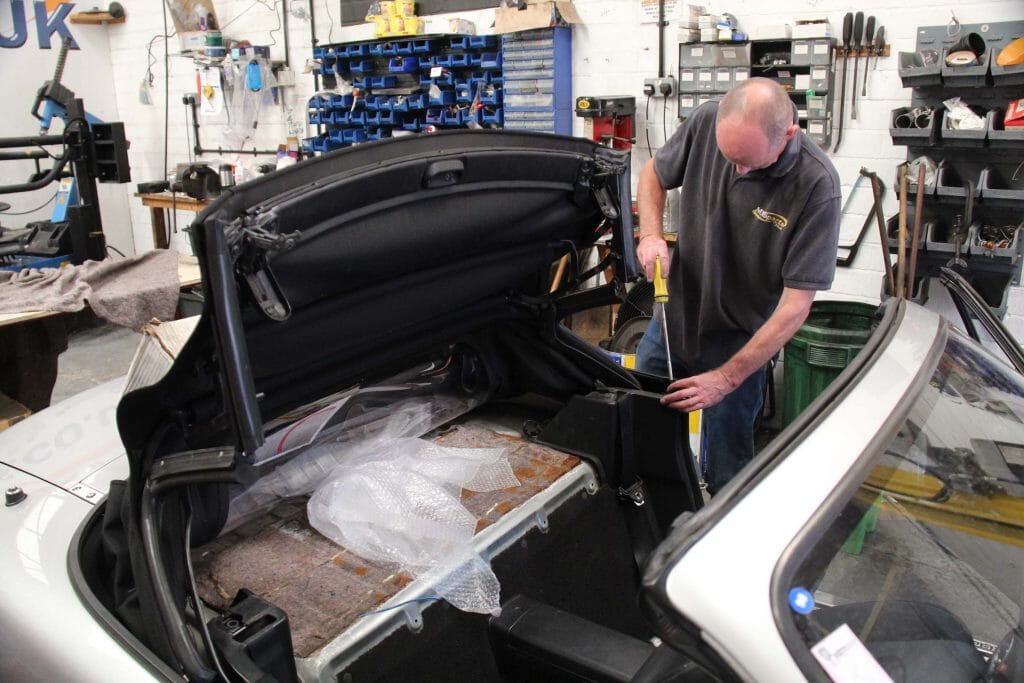
- Start by removing the interior parts, including harness bar (if fitted), upper seatbelt mounts, B-post trim and suchlike. Many of the hood parts from this point on are 'sided' left or right so it makes sense to have a box on each side of the car to contain them so they don't get mixed up.
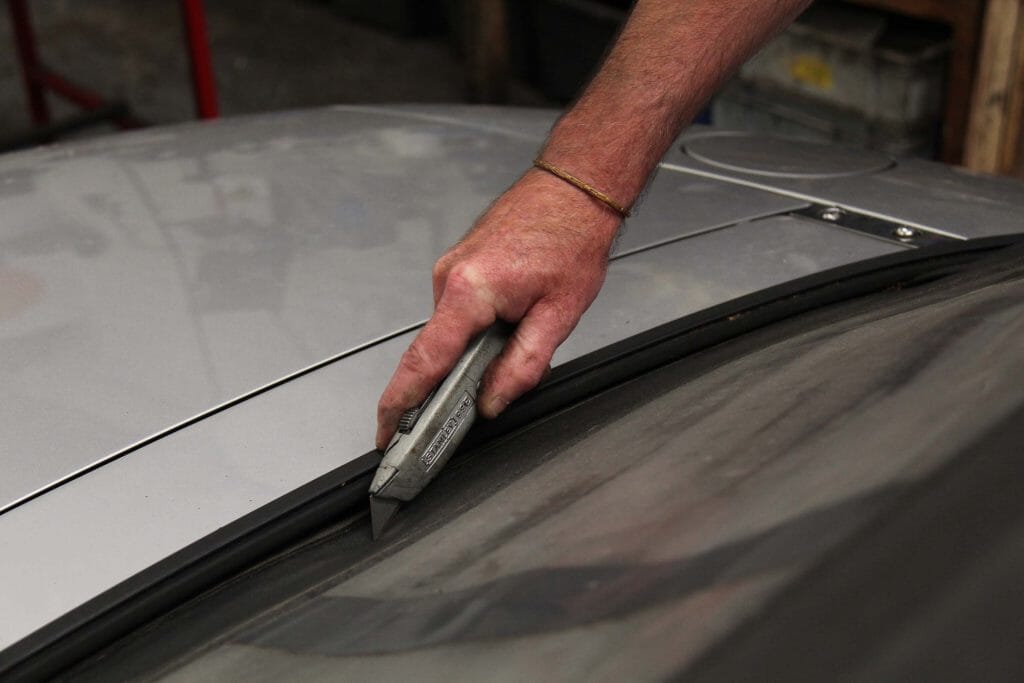
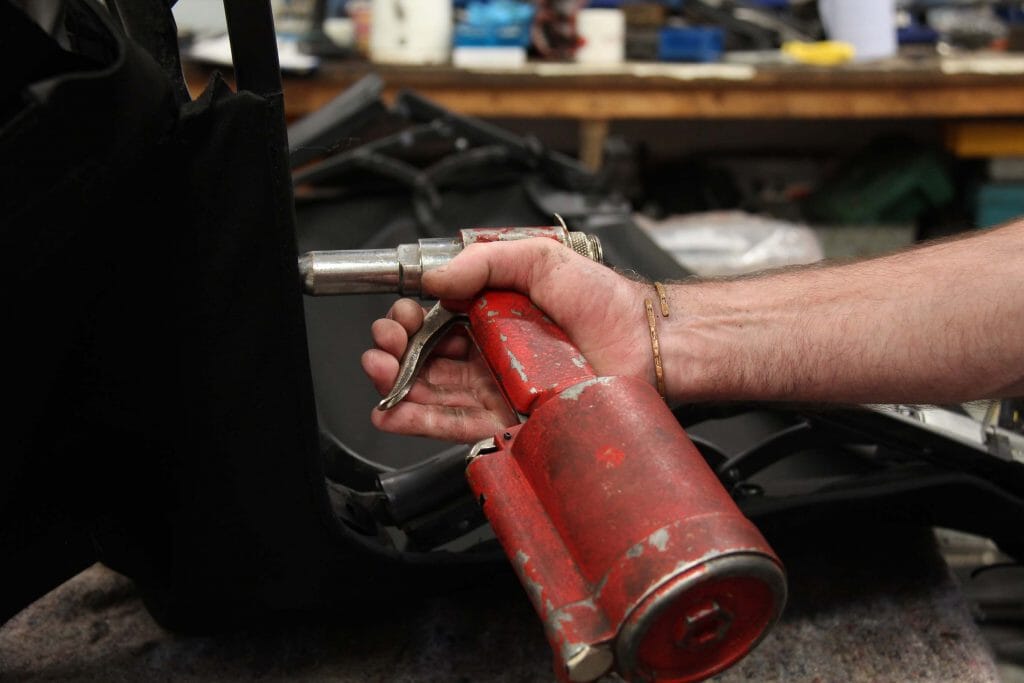
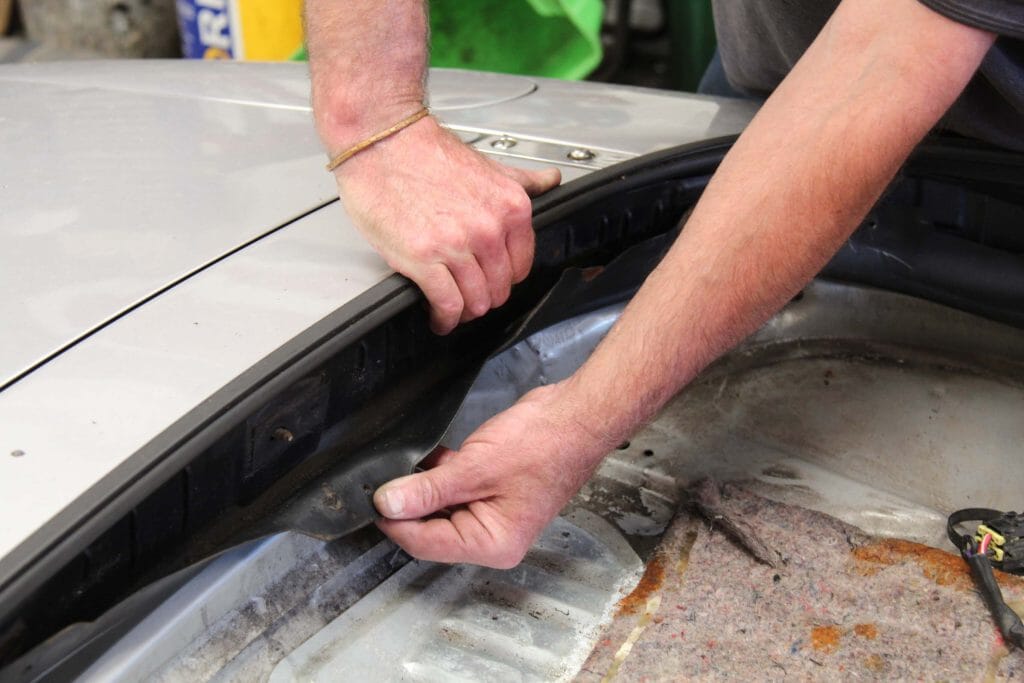
- Ready to commit? Take a Stanley knife and carefully cut the hood along its rear edge, all the way around the rain rail. There's no going back now!
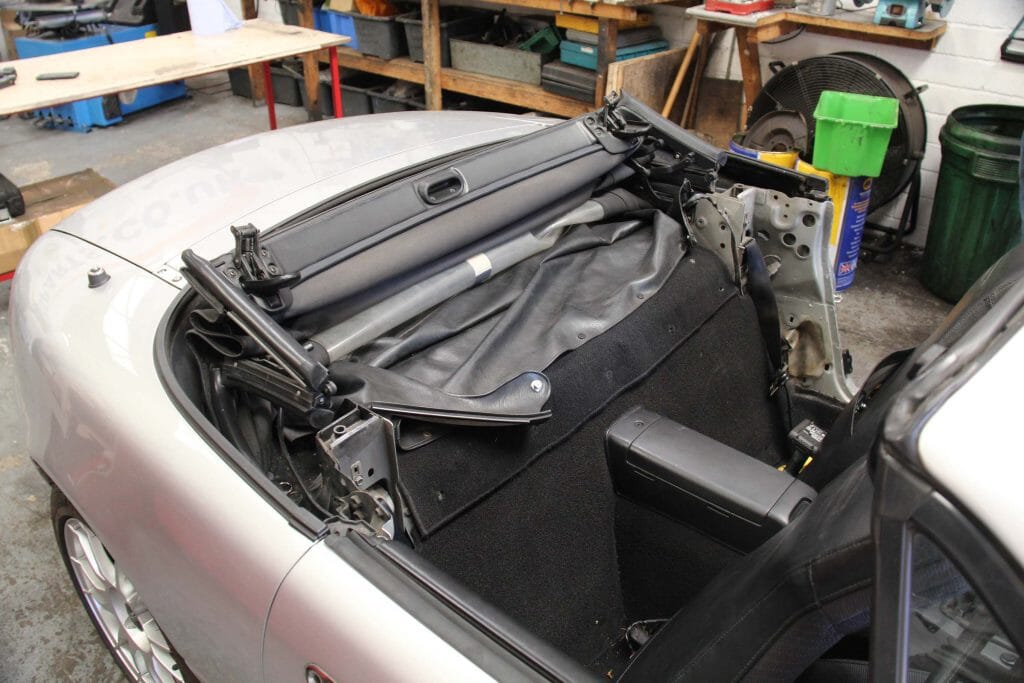
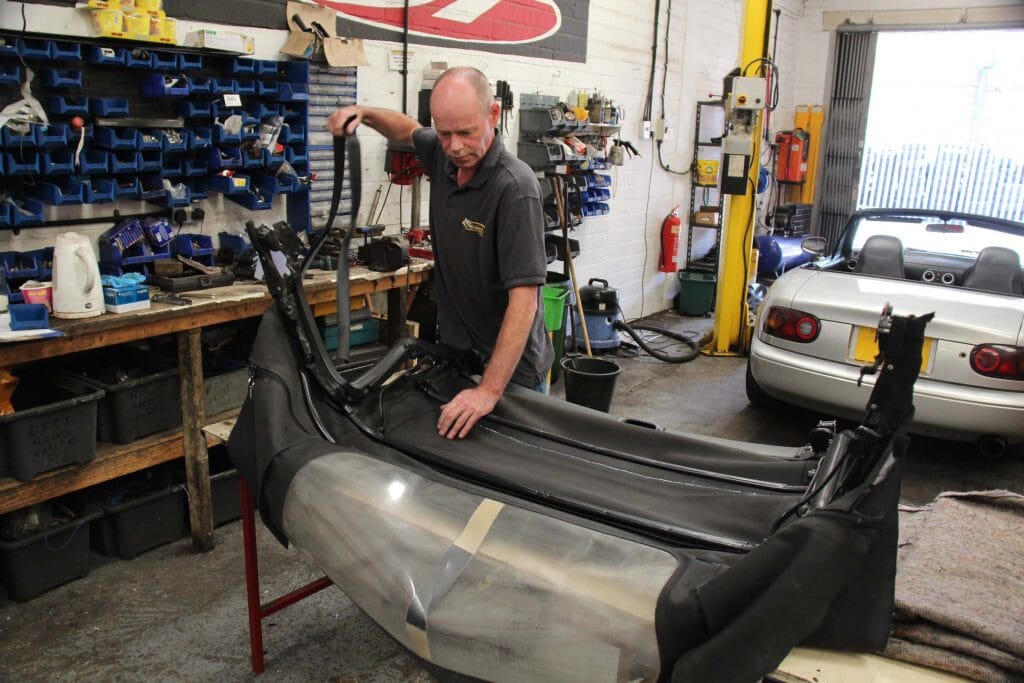
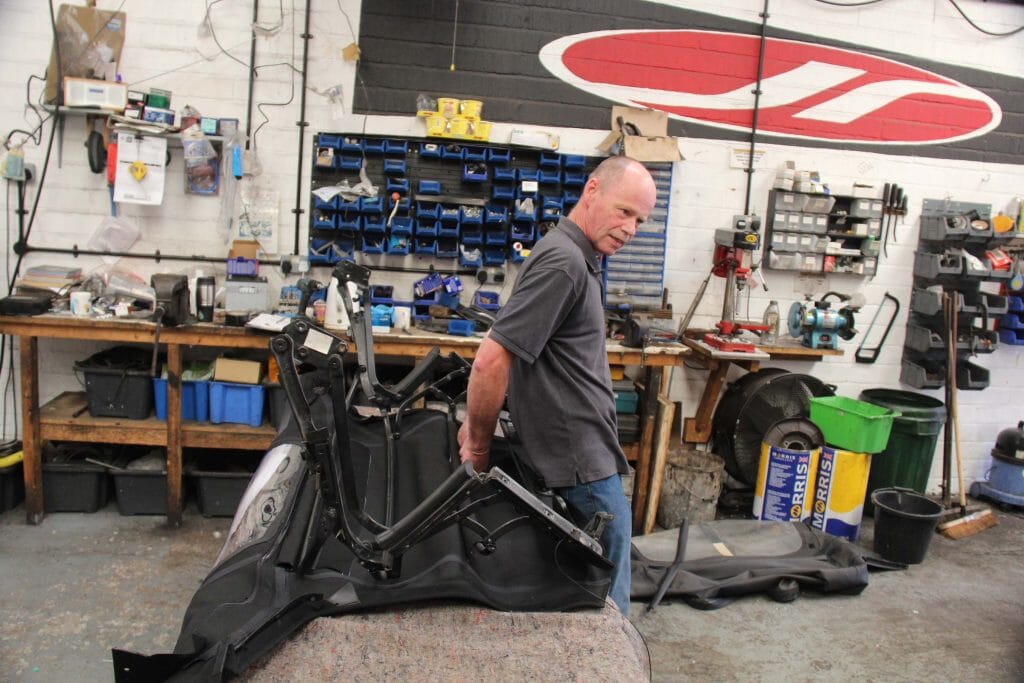
- Unbolt the frame mounting bolts on the B-pillars behind the seats and carefully remove the hood from the car. You can do it on your own but an extra pair of hands might be handy at this point. A table or workbench behind the car makes for a good place to hold the hood and work while you replace the skin so set this up before removing the frame from the car.
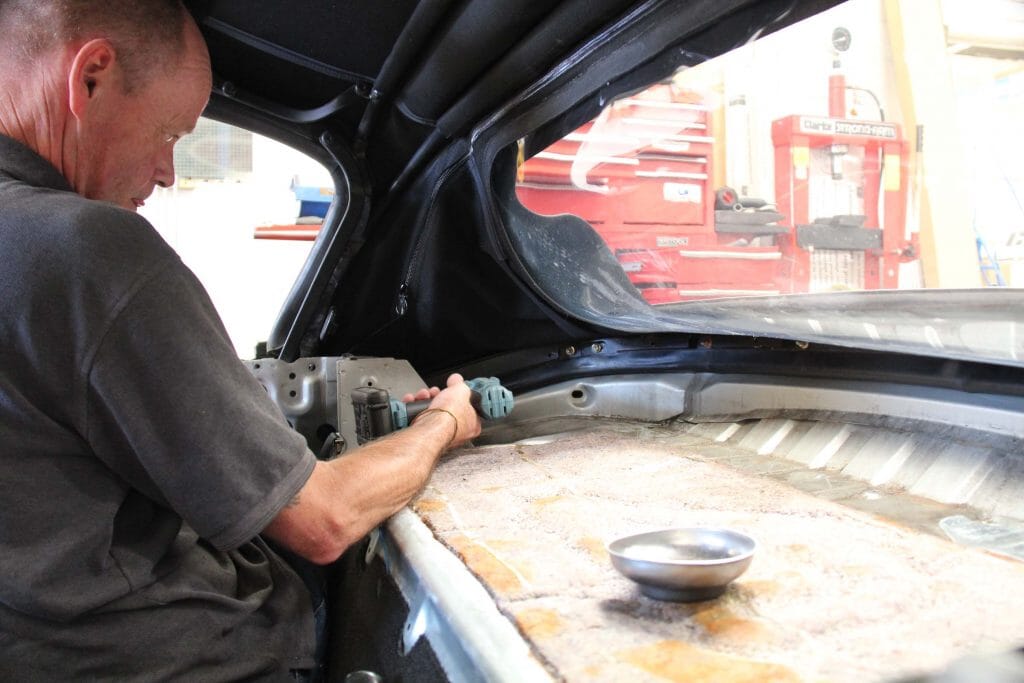
- Remove the carpet and trim from the parcel shelf by prising off the plastic clips. This will expose the body shell and now's your one and only chance to clean this, make sure your drain channels are clear (if you haven't already make sure you have our special brush!) and there are no horrors lurking under the carpet. Give it once over with a sponge and let it dry while you're working on the hood itself.
- Remove the rain rail by unscrewing the 10mm nuts attaching it to the rear bulkhead. If the hood has been in place for a long time there's a fair chance this will need replacing too - they distort and go brittle with age and any cracks will let water into the car. If it's good enough to keep prise it apart and remove the remains of the hood you cut away.
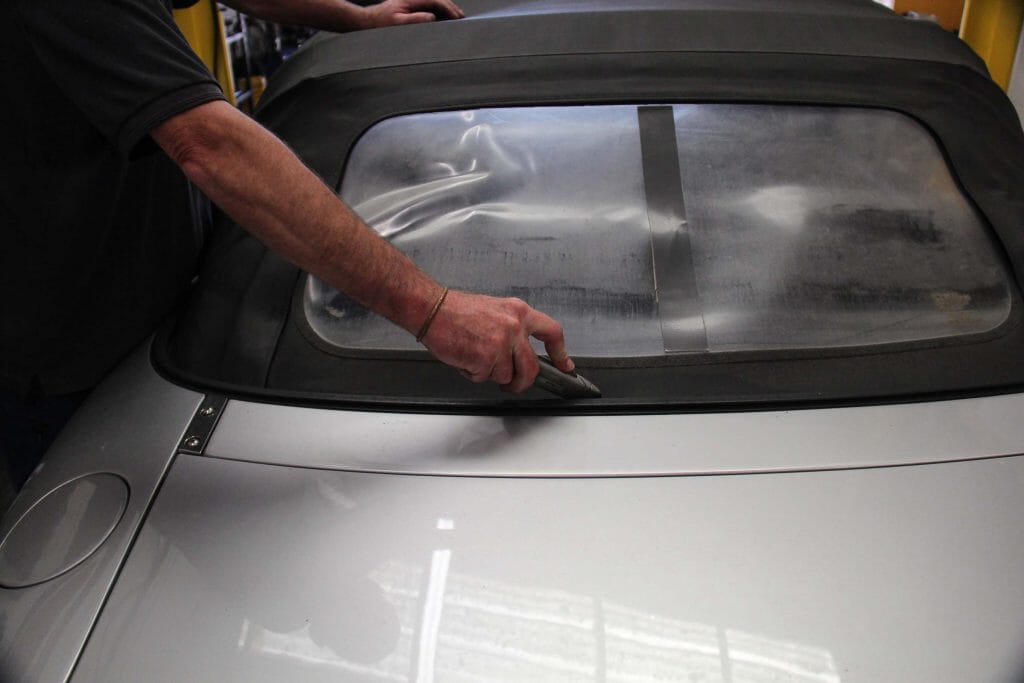
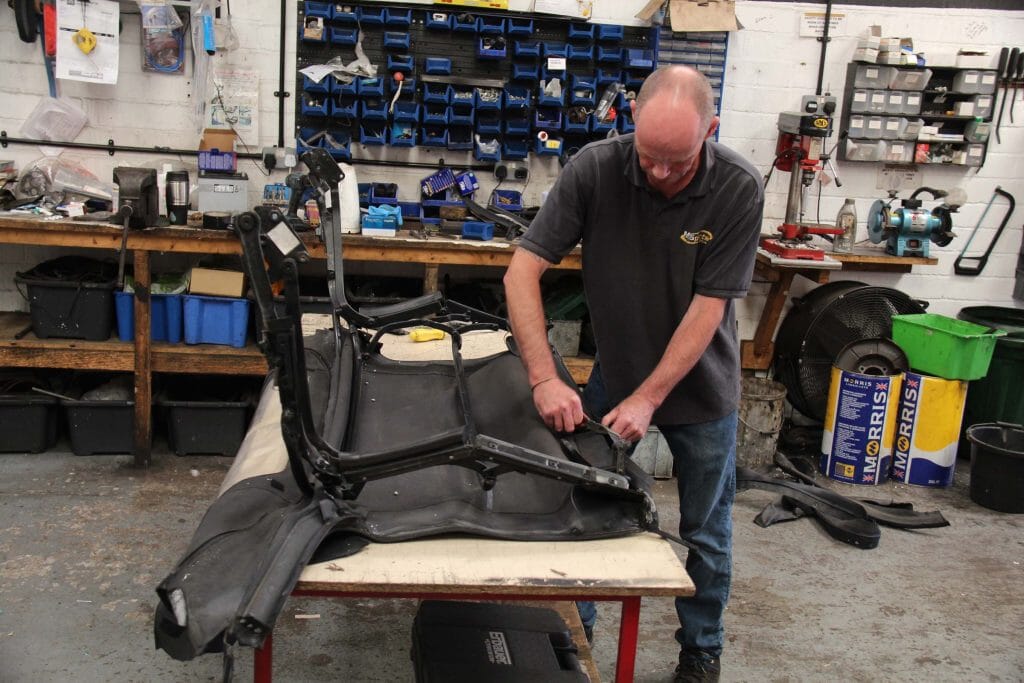
- With the hood on the bench remove the seals and other trim pieces, taking care to put them in the correct 'sided' boxes you prepared previously.
- Cut the hood from the transverse bars, unhook the tensioner cables and draw them out of the fabric, inspecting their condition as you do so. Remove the header rail and peel the hood fabric from the cross member.
- Remove and discard the old hood.
- Inspect your frame and make sure there is no significant corrosion anywhere; repair as required or replace if necessary - factor contingency time for this as you think necessary.
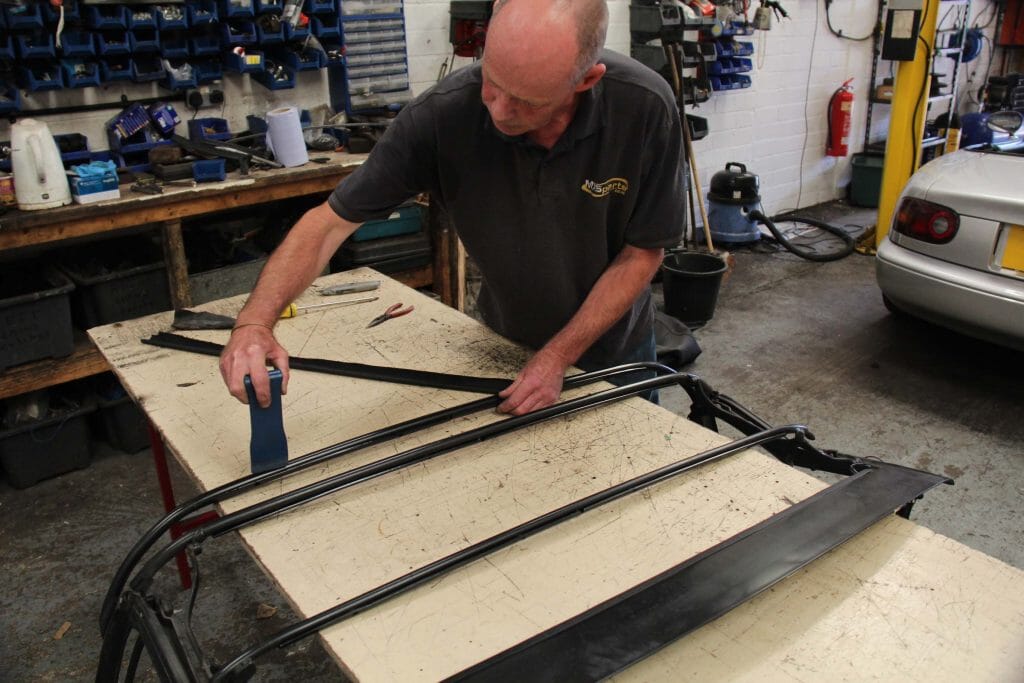
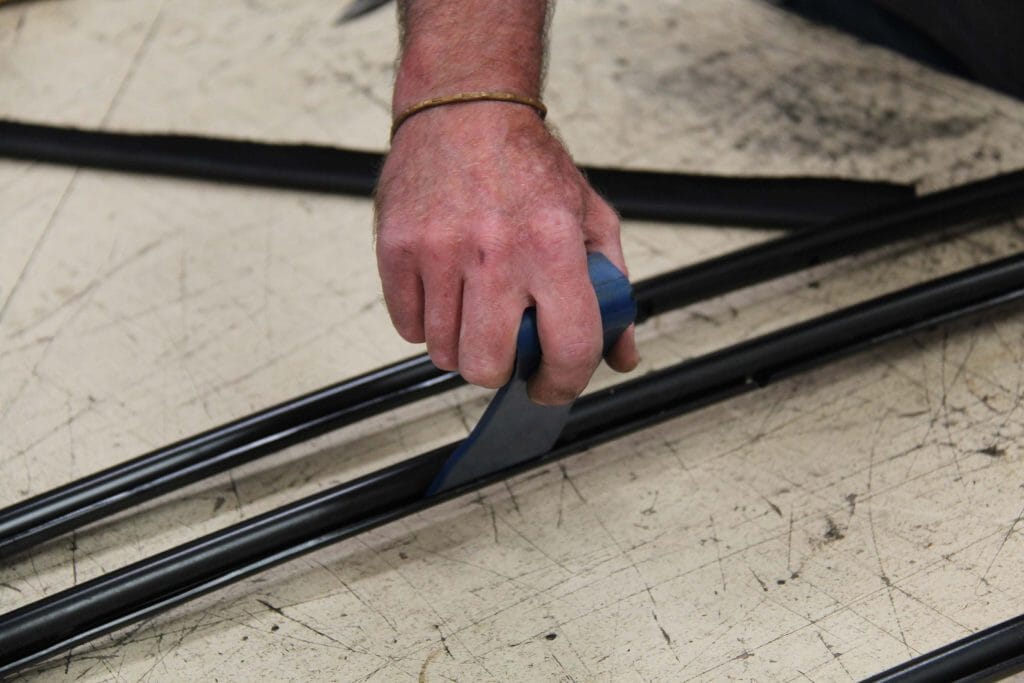
- Carefully prise the metal from the cross members ready to pinch the new hood in place - a plastic wedge or paint scraper is ideal for this.
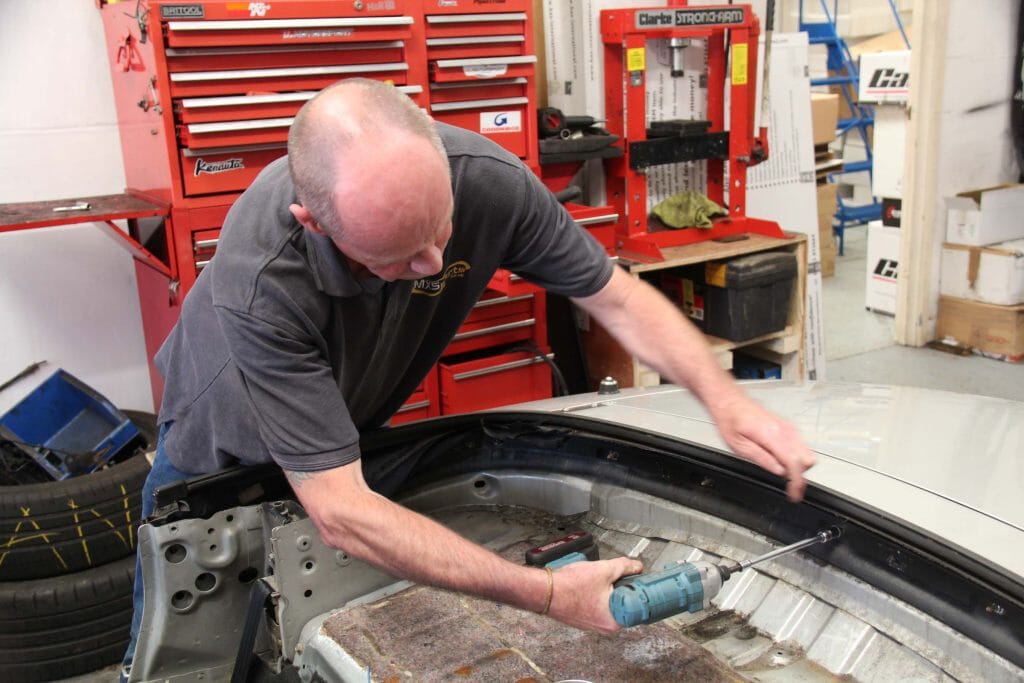
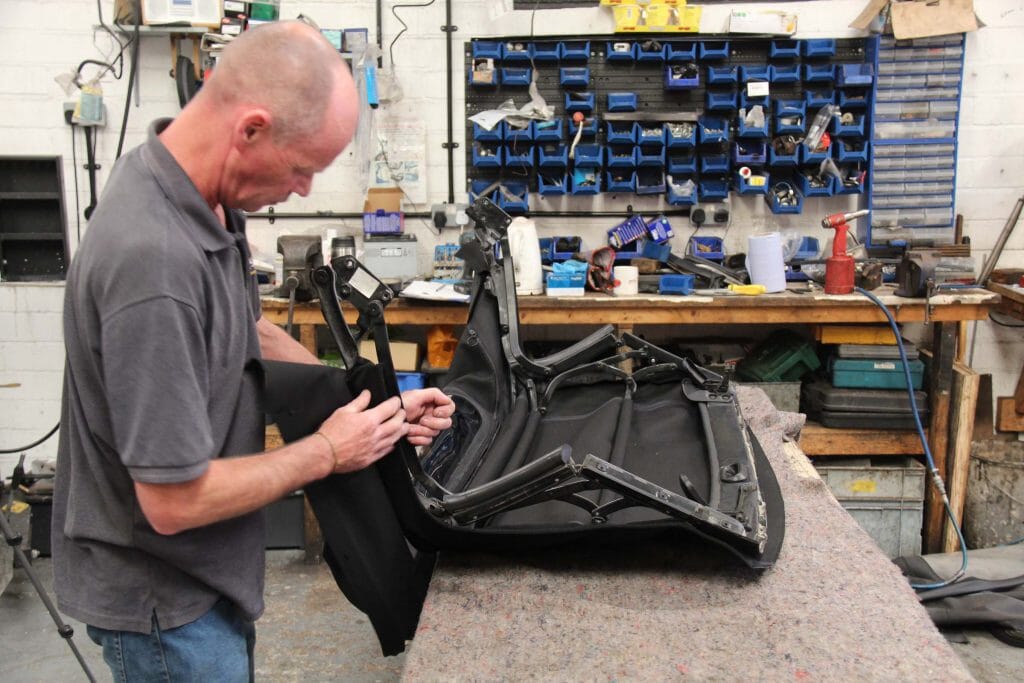
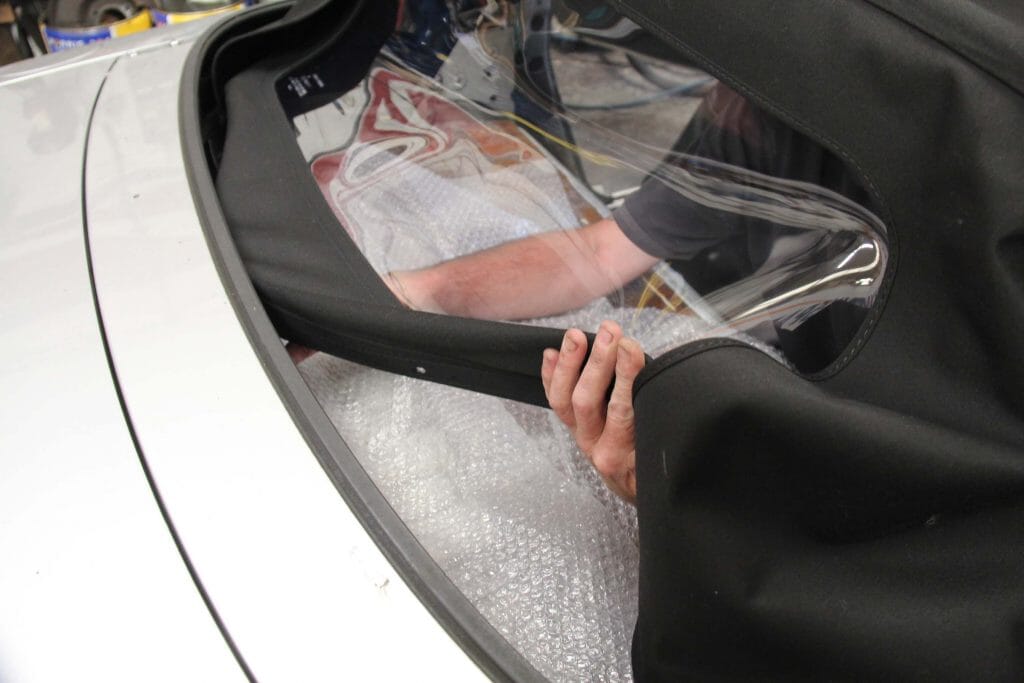
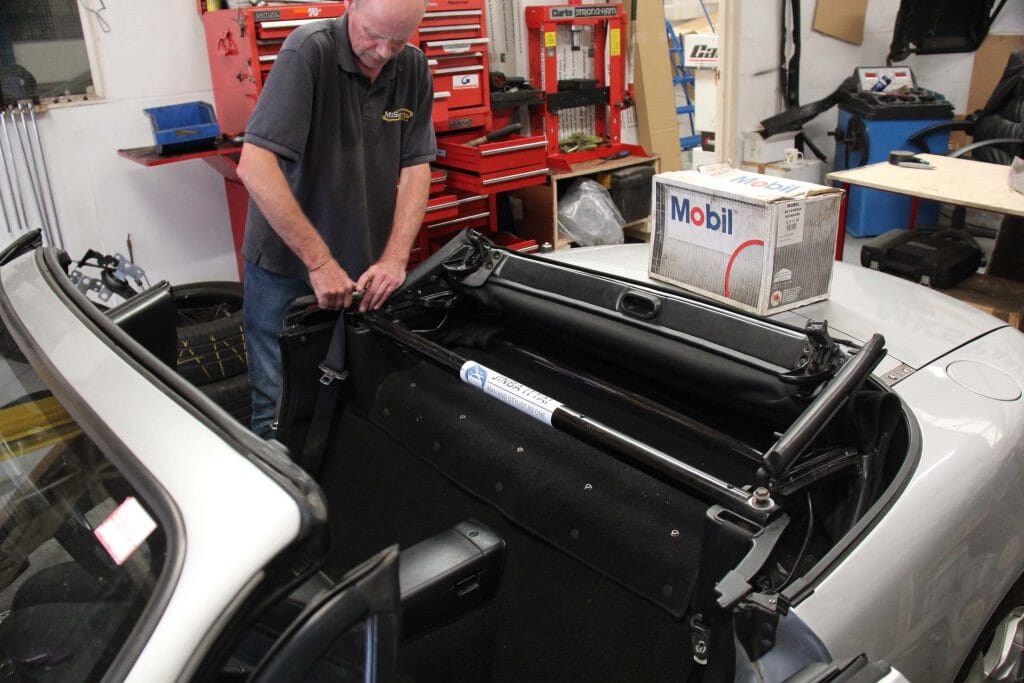
- Set the frame aside and lay the new hood out on your workbench. Place the frame on top and work the fabric around the cross members - it's actually easier to get your fingers under if you turn round and do this facing away from the hood! Carefully crimp the fabric under the tongue running the width of the cross members.
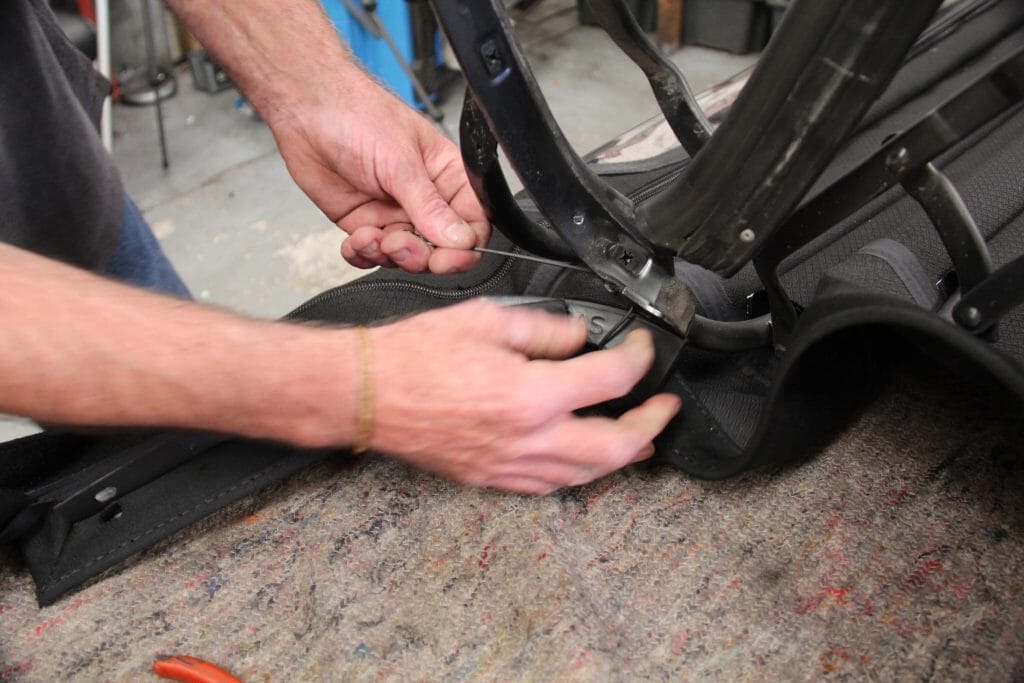
- Partially 'fold' the hood and reconnect the tensioner cables, taking care to route them correctly out of the frame, through the fabric and back. Reattach them to their springs and carefully replace the hood onto the rest of the frame mechanism, making sure the mounting holes line up before screwing the seals and other pieces in place. Tension the fabric and rivet the hood to the B-posts on the frame.
- The 'correct' method involves using rivets to wrap the rain rail around the lower edge of the hood before re-installing; it's easier to just mount the rain rail into the car and attach the hood through the studs on the bulkhead. If you're doing it this way just make sure you seal the rivet holes in the rain rail with tape first.
- With a helper carefully reinstall the hood frame to the car, lining the pivots with the studs in the body and reattaching the nuts. With something to prop the roof part open climb inside and feed the lower edge of the hood over the rain rail and locate it on the studs. The fabric should be clamped within the gutter of the rail, NOT to the outside of it. Reattach the frame rail using the 10mm nuts.
- The hood may feel 'tight' to close. don't force it but leave it out in the sun to soften before carefully stretching it shut. Repeat a couple of times and - if you've done it all right - it'll now fit perfectly.
- Replace the parcel shelf carpet, interior trim and seatbelt mounts.
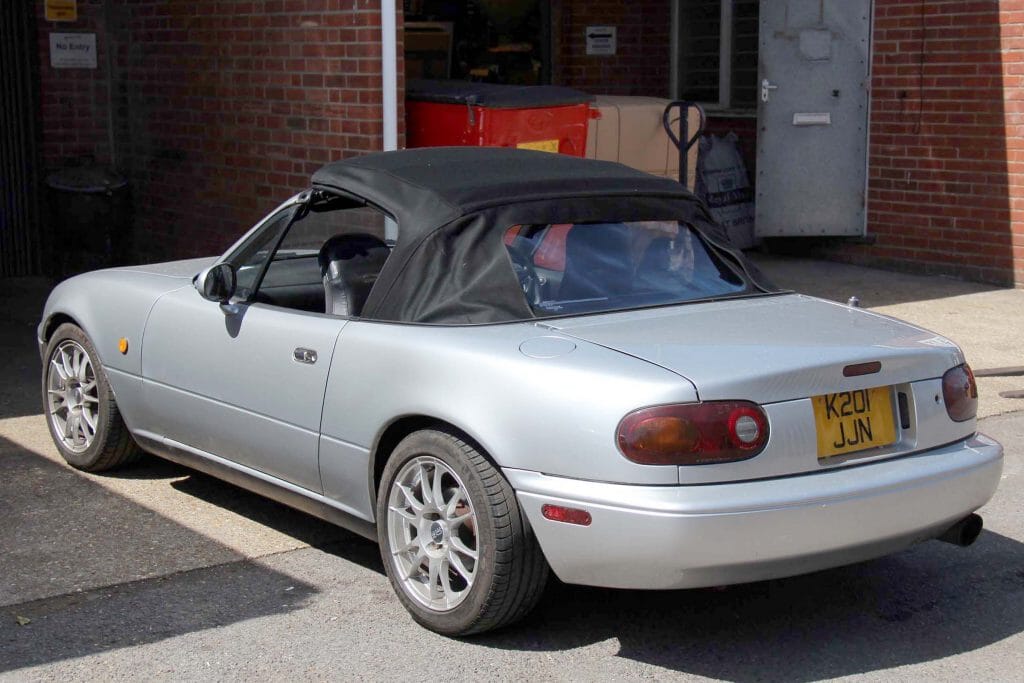
- you're done! To keep your roof in top condition stock up on the necessary cleaning and proofing products available in the relevant hoods page for your mark of MX5.
How-to in pictures
Parts List
- Mk1 range of Hoods
- Hood Drain Cleaning Brush
- Mazda Original Rain Rails
- IL Motorsport Rain Rail
- Replacement Hood Frames
- Hood Drain Cleaning Brush
- Hood cleaning and proofing
Don't forget we offer a free fitting service on all of our hoods at our workshop in Portsmouth. To contact us call +44 (0)2392 644588
Leave your comment